
Workflow Essentials: Dynamics 365 for Finance and Operations


Configurable Workflow Hierarchy in Dynamics 365 for Finance and Operations
We often have customers requesting different kinds of approval hierarchies in workflow documents. For example, in some cases there could be a line reporting structure; and in other cases, expenses may need to be routed to different business unit heads. There could also be an instance where items of a certain value must be routed to a different hierarchy within that department.
Read the BlogIf you’re anything like me, working with workflows has sometimes resulted in confusion and frustration. The first time I attempted to configure a workflow I didn’t really know how to begin so of course, I went online. As I navigated around, I expected to find general resources that would cover basic concepts enabling me to get started but found that while there is information out there, it seemed to be very specific to an area or quite basic and lacking much detail.
As a result, in this article, I will attempt to provide information to help you navigate through basic workflow concepts building towards creating our own workflows which I’ll cover in a later post.
What are workflows?
A workflow is a set of steps with predefined rules and conditions that will result in a repeatable, controllable, automated process for approvals. Gone is the need for informal, ad-hoc conversations and emails with coworkers to push paperwork through. Workflows are a way for users to ensure that predetermined actions take place after being triggered by specific events.
Functionality and ease of use in D365 workflows has been growing with time. They can be set up with a simple decision point or can have several steps depending on the size of the business and the complexity of the requirement. Out of the box, D365 has dozens of standard workflow templates that with a little bit of tweaking and configuration can help you achieve what you are looking for and the list keeps growing.
Where do I find them?
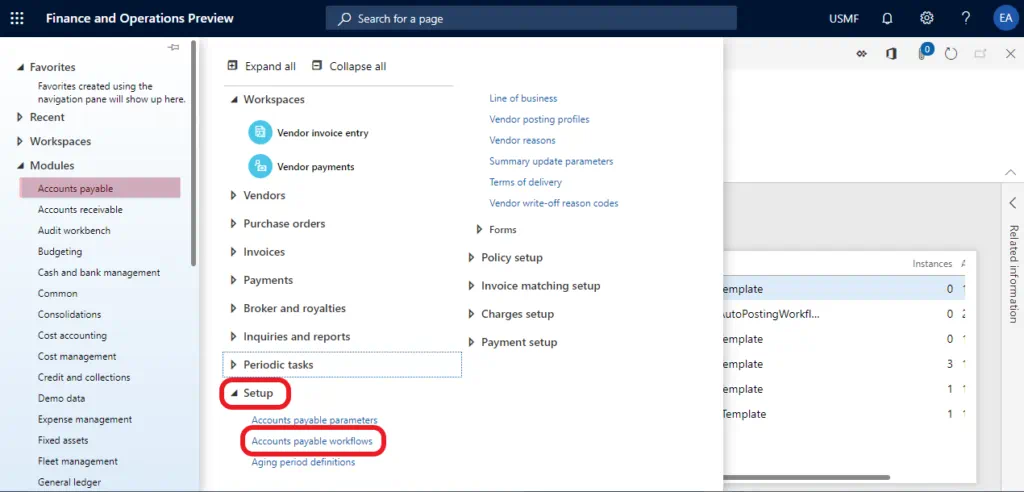
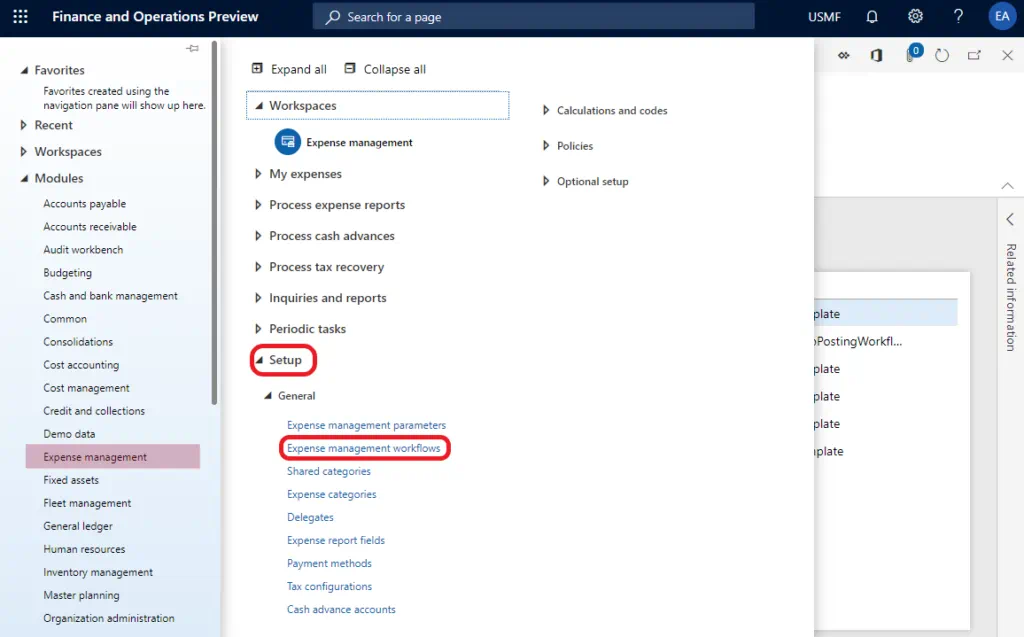
Users can find workflow set up spaces in almost every one of D365 F&O’s Modules. Workflow templates are unique to each module as there is specific logic and code behind the scenes that will trigger the different events.
You will not find an Accounts Payable workflow under the Expense Management module, but you will find at least twelve different templates for AP which are pre-made based on the most common workflow requirements.
To find the workflows and templates, navigate to the module where you want to configure the workflow. Most of the time workflows will be housed at a level below the Setup area page although they can also be a couple of levels down. If it exists for this module it should be easy to find.
There are some modules that simply don’t have any workflows accompanying specific functions. However, just as I mentioned before, Microsoft adds more and more templates as time progresses.
Once you are in the workflow page, all you must do to find a template is click on the +New button on the Action Pane to create a new workflow and the template list will appear. In the example below, I am showing all the different templates included in D365 under the Accounts Payable module.
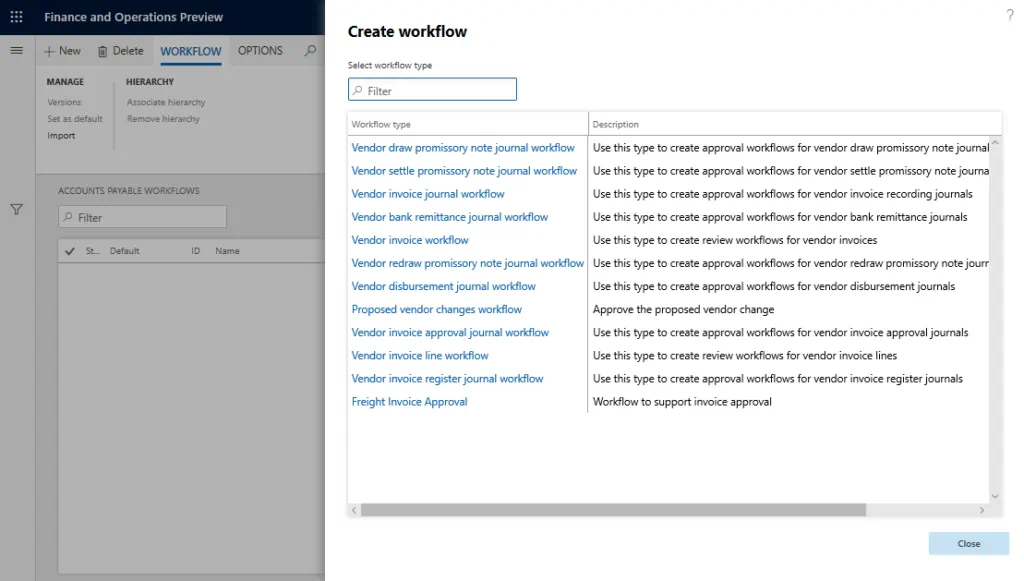
You can see that there are options for you to set approvals at the Header level as well as some workflow options for individual lines. How detailed the workflow will be depends on the organization’s size, the number of touch points and the complexity if its processes. Keep in mind that it is better to keep them simple as more intricate workflows will be harder to configure and get working just right. They will also take longer to run, especially if there are multiple approvers and sub workflows in the process.
By clicking on the template, you are choosing it as a base to construct your workflow and opening the workflow editor.
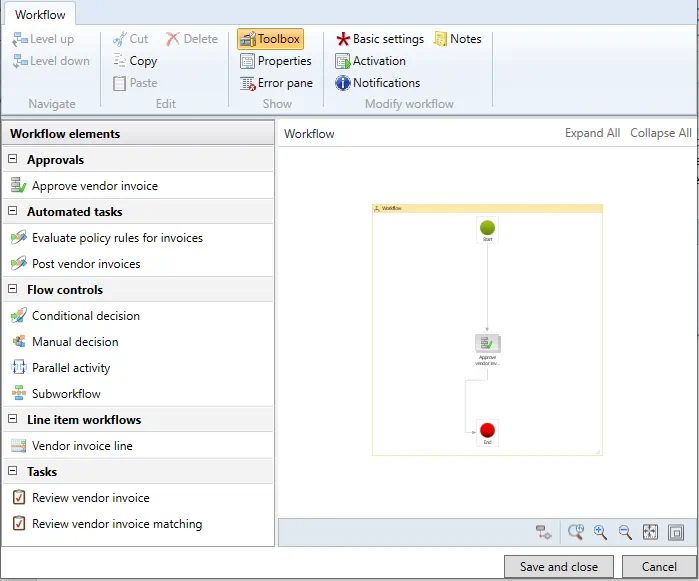
Workflow editor essentials
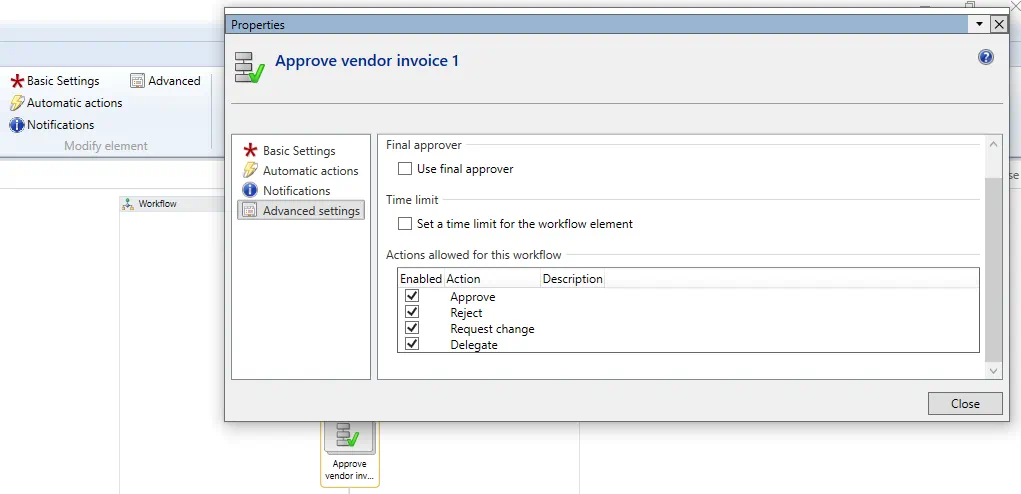
The workflow editor window you will be presented with is divided in four main components:the ribbon displays four groups of buttons. At the far left, Navigate provides the ability to level up to design the end to end process or to drill down into a specific step to configure all the different conditions. The Edit group, a standard group of functions will enable you to cut, copy, paste and delete each step of the process. The Show group comes in handy when you want to hide your toolbars and have as much space as possible to work with the steps of the process. Click on the different buttons to show the different controllers. By default, the Toolbox and the Error pane will appear for the user.

With Modify element buttons you can set triggers, actions and notifications for the process step (element). You will become quite familiar with these buttons as this is where most of the workflow action happens.
At the far left of the application, the Toolbox displays the list of elements you can add to your process. Approvals, Decisions, Flow controls, Sub-workflows, Automated steps and tasks are listed in the window and can be easily dragged and dropped to the canvas.
The workflow Canvas is where you work to arrange the different steps and connect them as per the design and result you are pursuing. When you first open the editor, the canvas will include the Start and End points of the workflow. As you build the process from step to step you connect them together in the order you want them to be executed. It is a simple interface and if you have worked with Visio before it will feel familiar and intuitive
At the bottom right of the canvas, the zoom controllers allow you to step back and look at the complete process from end to end or zoom back into a specific group of steps in your process.
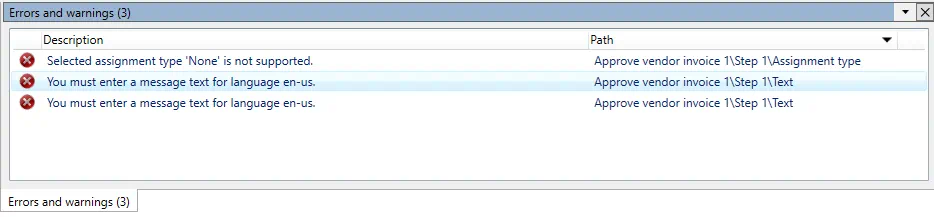
The fourth and final frame in the application is the error pane. For me, this is one of the most useful tools as will give you a list of all the errors that one must correct to be able to have a functional workflow. Just double click on the line and it will take you right to the place where you can solve the issue.
Just like with anything else, users can expect a bit of a learning curve. With time, as you work with D365 workflows, you will become more comfortable with the tool and its capabilities. I hope that the information in this post makes it easier to get started, I know it would have been useful to have it when I first gave it a go.
In a next post we will walk through more basic setting and options available to the users and work towards building our own workflow.