
USD 101 Part 2: Install and Configure a USD Test Instance


Walk-through: Install and Configure a USD Test Instance
In USD 101 – Part 1 we reviewed the high-level USD architecture to gain an understanding of the USD landscape. In this second session we will aim to get a simple demo environment up and running.
For this walk through we will start with a fresh Dynamics trial environment which you may request here.
Step 1: Access the link above following the on-screen prompts to procure a trial Dynamics environment. (10 mins).
- Save the instance URL, User Name, and password you will be asked to provide during this process. We will need this later.
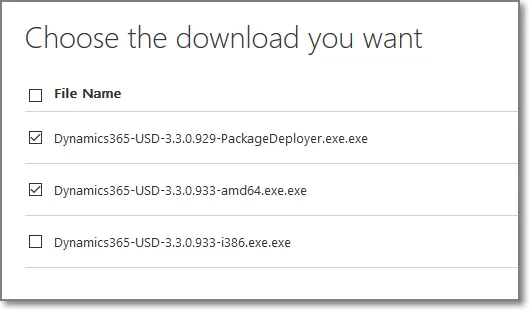
Step 2: Download the USD software package. (5 minutes)
- Download and install package deployer from the USD download page
- Be careful to get the latest version or it may not connect to your environment. I’ll provide the current link below but you may have to do some digging to find the latest release.
- Version 3.3.0 as of May 2018 – https://docs.microsoft.com/en-us/dynamics365/customer-engagement/unified-service-desk/download-unified-service-desk
- When you’re here grab both the Package Deployer and USD client files. You should only need the USD client for your system architecture (x64 or x32).
Step 3: Install the USD Package Deployer. (5 minutes)
- Once downloaded, Install the Package Deployer by opening the Package Deployer executable from Step 2.
- This will extract a series of files to a folder you designate and run the package deployer utility.
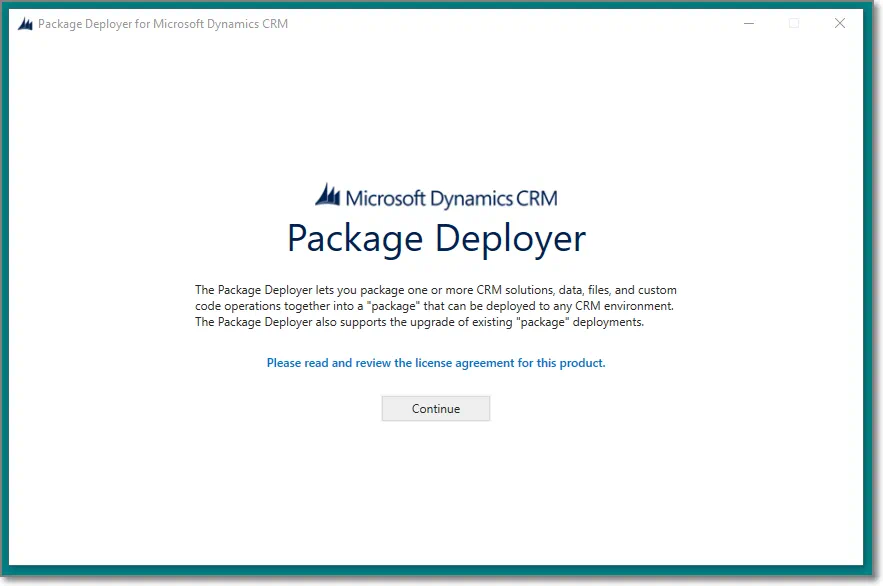
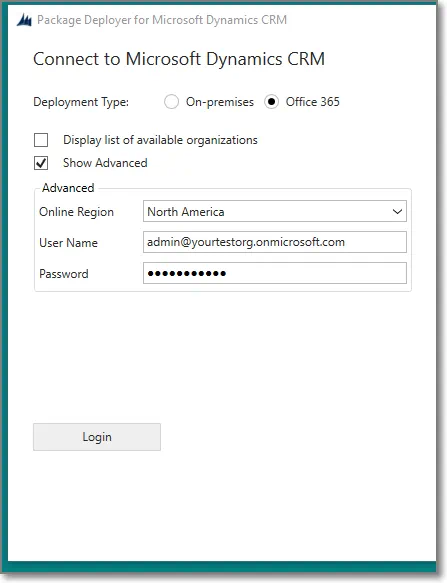
Step 4: Configure the Package Deployer (1 minute)
- Click “Continue” on the splash screen to find the authentication screen.
- Your connection should be similar to the following
- Type: Office 365 (for online Dynamics implementation)
- Show Advanced: Yes
- Region: Your global region (NA for me)
- User Name: The user name of your Dynamics trial user
- Password: The corresponding password
If all has gone according to plan you’ll be presented with a set of available packages.
- These are pre-configured example packages but can serve as good starting points for new implementations.
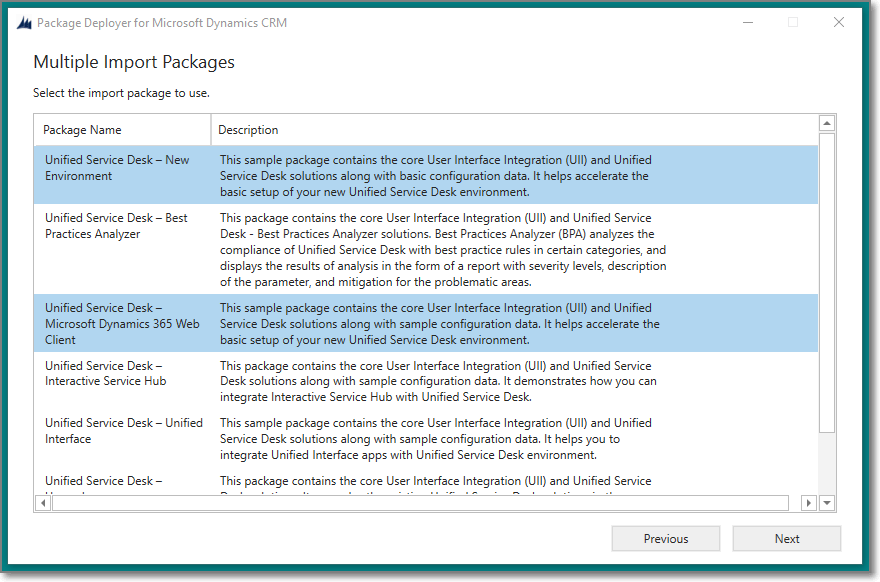
Step 5: Deploy an example package (1 hour… give or take)
- With the package deployer installed and connected select an example package to deploy. I suggest using with the Unified Service Desk – Microsoft Dynamics 365 Web Client or the Unified Service Desk – Unified Interface package.
- With your package selected, click next (a few times).
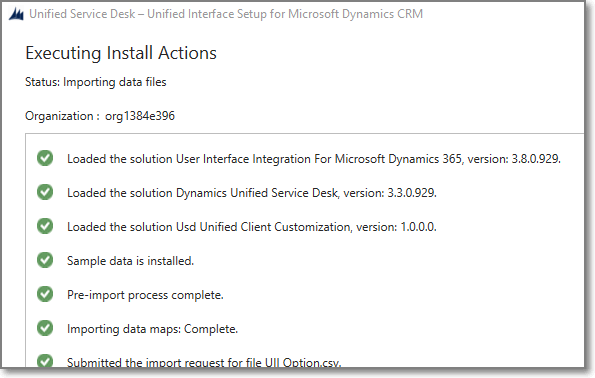
*The package deployer will now install USD assets into your Dynamics environment. Note that this can take quite some time and there is a high probability it will timeout in the middle. If this occurs, simply re-run the package installation and it will pick up where it left off.
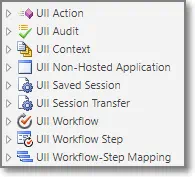
Once successful you will see 3 new solutions loaded in your Dynamics environment and a host of new entities added to support USD.
*If you want to reset your instance and install a different package you must first delete solutions that were added as part of the initial deployment.
New Solutions:

New Entities:
Step 6: Install the USD client. (5 minutes)
- Go back to the downloaded files from Step 2 and Install the USD client for your operating system (32/64)
- Note, this is the USD Client install, not the package deployer… that comes later.
- This should be an easy “just click next” style installation.
- Choose a location on your machine that has more than 1GB of free space. Then click “Next”.
- Pre-requisites will be installed if necessary
- .NET Framework 4.6.2
- Windows Identity Foundation
- USD will be installed
Step 7: Connect to Dynamics through USD (1 minute)
- Provide your Dynamics login details and, assuming you’ve been successful in the above steps, you should be able to log in to a fresh USD implementation. Congratulations!
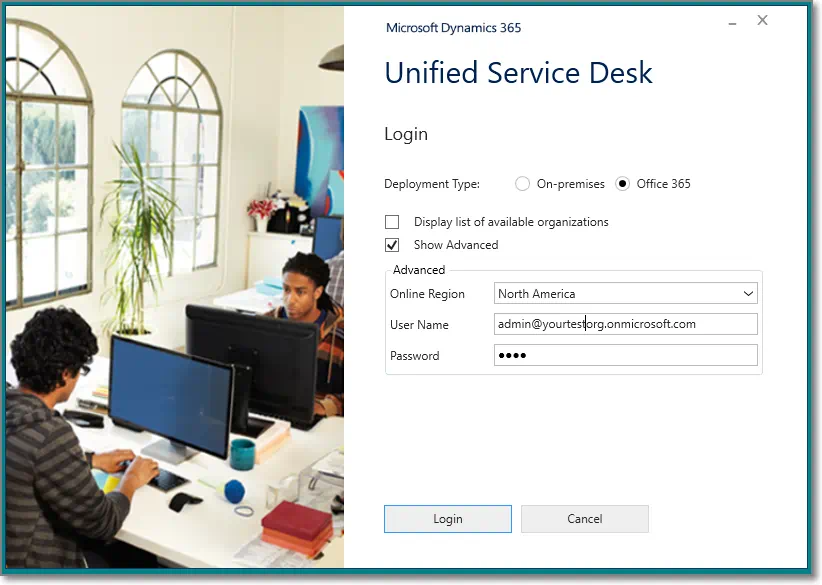
Note that USD uses the Internet Explorer process to render web pages. You may want to make sure you can open your CRM trial environment in Internet Explorer if you’re having trouble surfacing dashboards and views in USD.
And there you have it! I hope this tutorial was helpful. We’ll be back with Part 3 to discuss some common best practices and considerations for performance.